Products
Solutions
Resources
9977 N 90th Street, Suite 250 Scottsdale, AZ 85258 | 1-800-637-7496
© 2024 InEight, Inc. All Rights Reserved | Privacy Statement | Terms of Service | Cookie Policy | Do not sell/share my information

While most of your project structure typically imports from your estimating system, you may need to adjust the Cost Breakdown Structure (CBS) to better reflect how the work will be executed in the field. Additionally, contract changes or newly added scope may require updates. To accommodate these needs, you can add, edit, and rearrange cost items as necessary.
If you need to build additional structure from the ground up, you can create new cost items manually. This flexibility allows you to construct an entirely new project structure within Control – even starting from a blank project if needed.
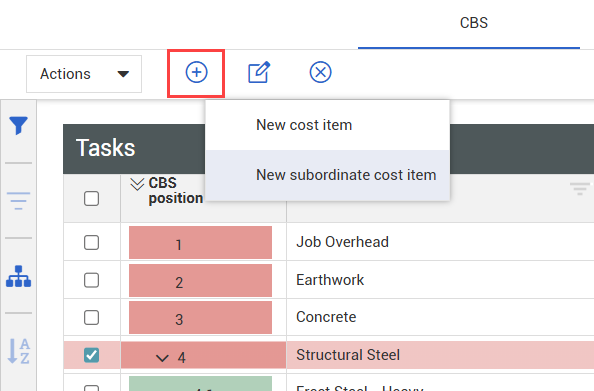
In Control, you can create a new cost item in two ways:
New Cost Item: Creates a new cost item at the same hierarchy level as the selected item, using the next available number. For example, if you select 1.6, the new item will be 1.7 (if available).
New Subordinate Cost Item: Creates a new cost item one level below the selected item, using the next available number at that level. For example, if you select 1.6, the new item will be 1.6.x, where x is the next available number.
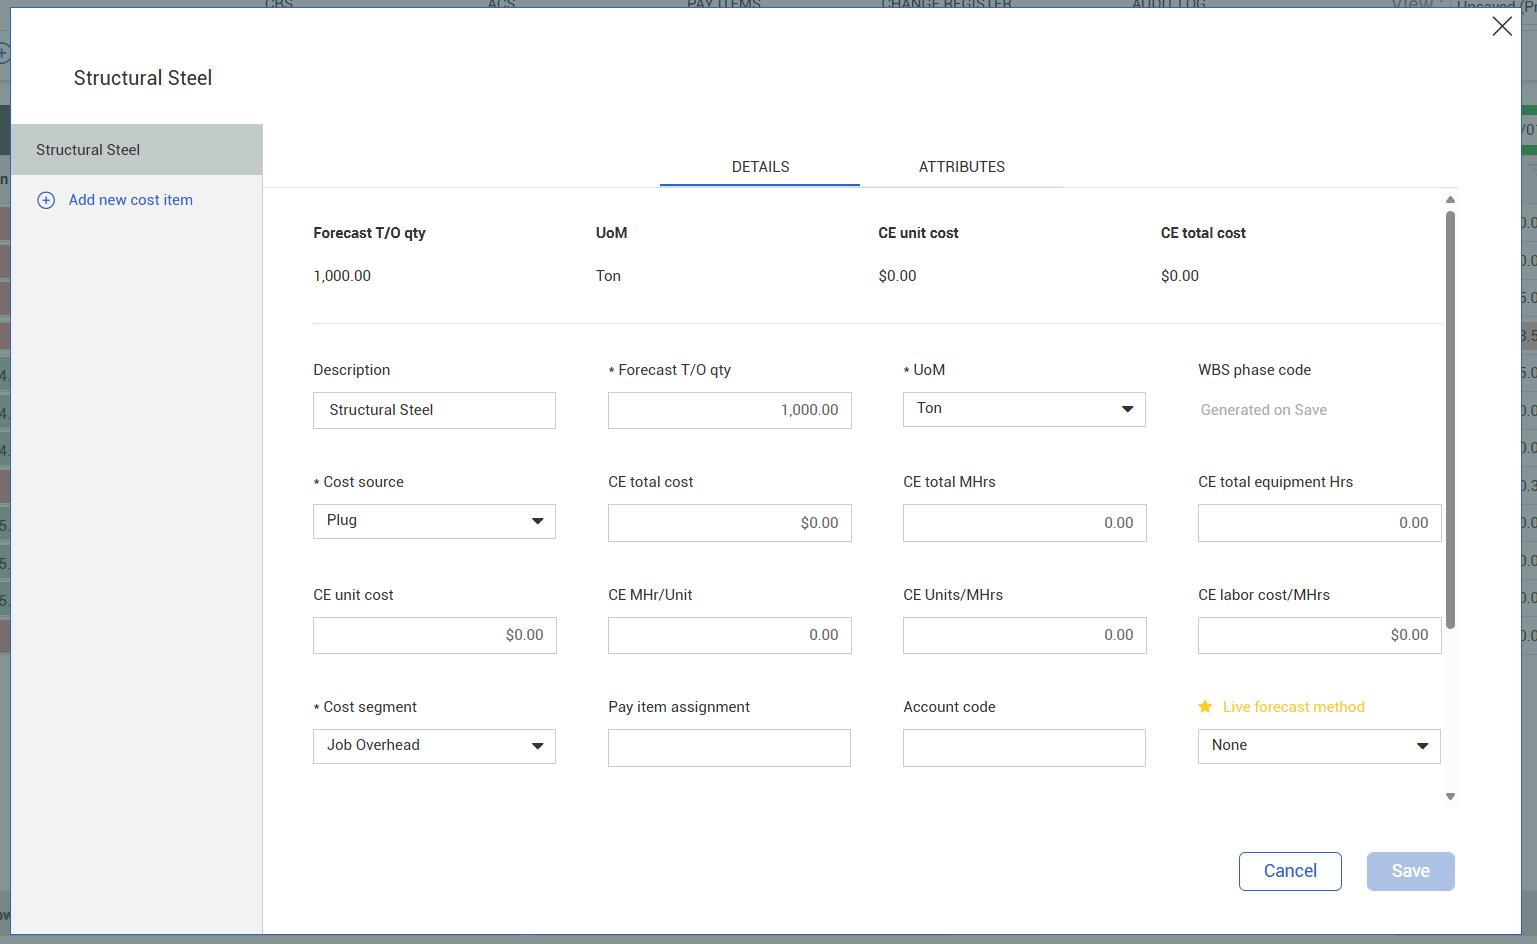
When creating a new cost item, there are multiple fields available for populating the cost item details. Not all fields are required; you can edit these details after the cost item has been created. The following table provides more information on the available options.
|
Field |
Required |
Details |
|---|---|---|
|
Description |
Optional |
Text field for the name or description of the cost item. |
|
Forecast T/O qty |
Required |
The Forecast Takeoff Quantity is the amount of work or materials expected to be completed for the cost item. This value can be updated as project details progress. |
| UoM | Required |
The Unit of Measure is the standard measurement used to quantify the Forecast T/O qty, such as linear feet, cubic yards, or labor hours. |
| Cost source | Required | Indicates how the cost item’s value is derived – either as a Plug (a lump-sum amount) or as Detail (built from associated quantities, rates, or resources). |
| Current Estimate fields | Optional | If available, input costs, unit rates, man-hours, and/or equipment hours. Many of these values are linked, and changes to these values will update related values as well as the Current Estimate total cost. Fields include CE total cost, CE total MHrs, CE total equipment Hrs, CE unit cost, CE MHr/Unit, CE Units/MHrs, and CE labor cost/MHrs. |
| Cost segment | Required |
Categorizes whether the cost item is a direct or indirect cost.
|
| Pay item assignment | Optional | Select an existing pay item to associate to this cost item. |
| Account code | Optional | Select an organizational account code for this cost item. |
| Live forecast method | Optional | Select how the live forecast is calculated for this cost item. Forecast Method applies to individual cost items and can be changed at any time. |
| Allow as-built | Required |
Determines whether you can enter actual costs and quantities for a cost item.
|
| Quantity driver | Required |
Defines how a cost item’s Forecast T/O qty is controlled.
|
| Currency | Required | Select a currency unit for this cost item. |
| As-built lock | Optional | Select the checkbox to lock the ERP status for this cost item. Once you lock the ERP status, your ERP does not allow the cost item to be progressed. |
| Hide in Plan, Progress, and Design | Optional | Select the check box to make this cost item unavailable for claiming in InEight Plan, Progress, and Design. For more information, see Hide in Plan, Progress, and Design. |
| CBS contribute qty | Optional | Select the check box to add the Forecast (T/O) qty of this cost item with any other selected siblings to the superior (parent) cost item. Note that the UoM must be the same for all cost items. |
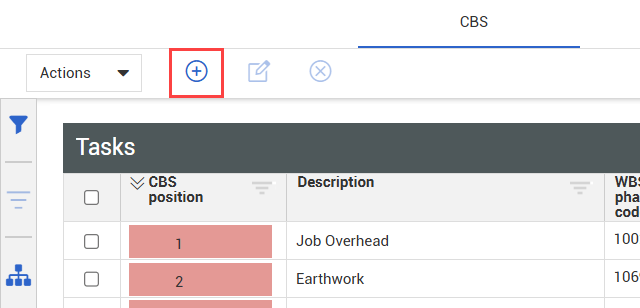
From the CBS tab of Control > Workspaces, click the Add Cost Item icon on the top left toolbar.
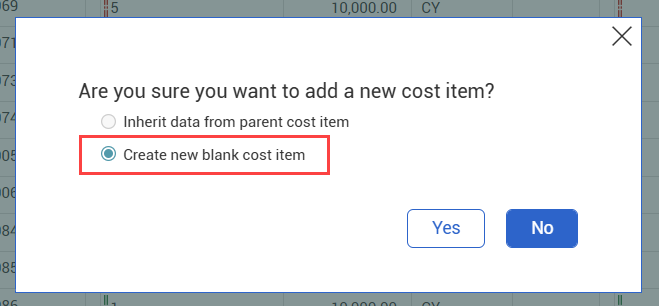
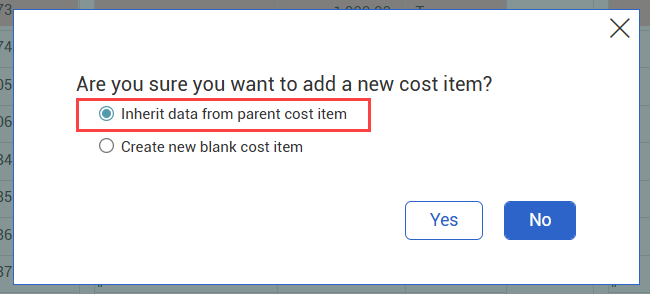
Select Create a new blank cost item, and then click Yes.
To specify the CBS position of the new cost item, first select an existing cost item from the CBS, and then click Add Cost Item > New cost item.
The New cost item dialog box opens to the Details tab. Enter the cost item details as needed.
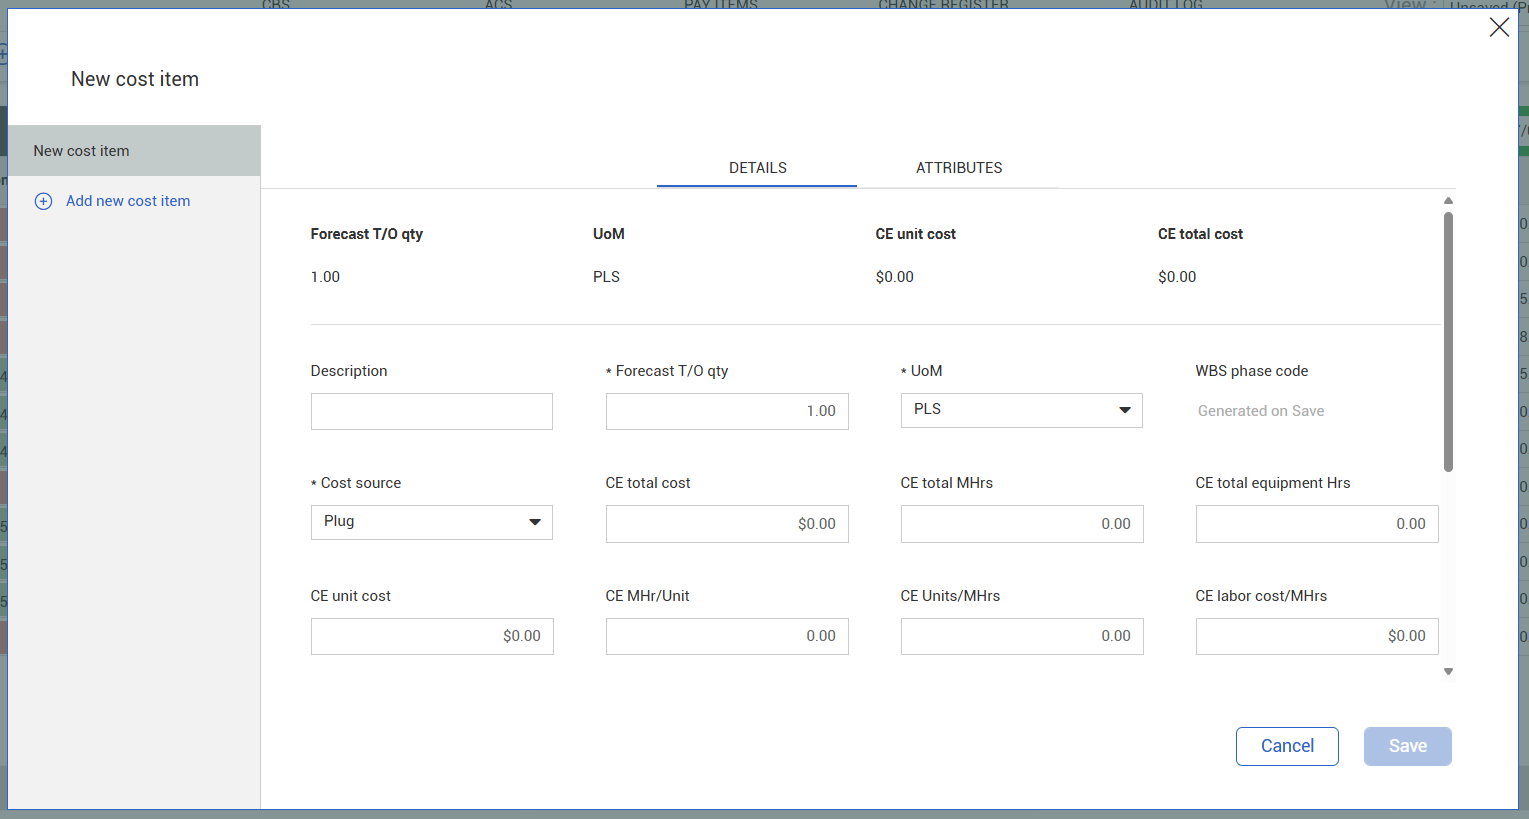
When finished, click Save.
From the CBS tab of Control > Workspaces, select the superior cost item.
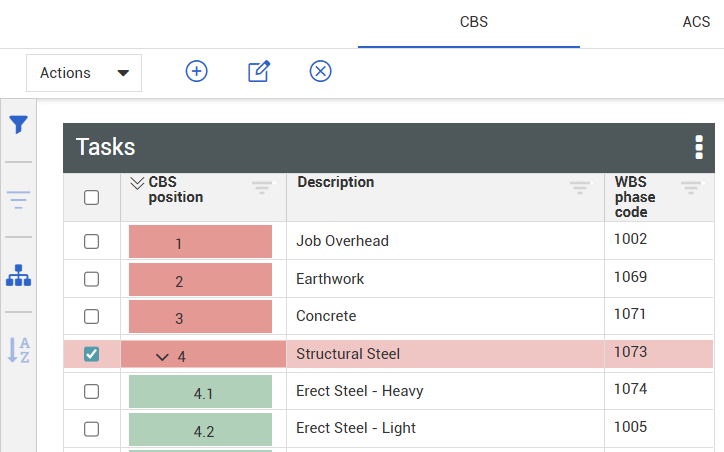
On the top left toolbar, click Add cost item > New subordinate cost item.
Select Inherit data from parent cost item, and then click Yes.
Note that the fields in the New cost item window are populated with the existing data from the selected cost item.
Modify the cost item details as needed.
When finished, click Save.
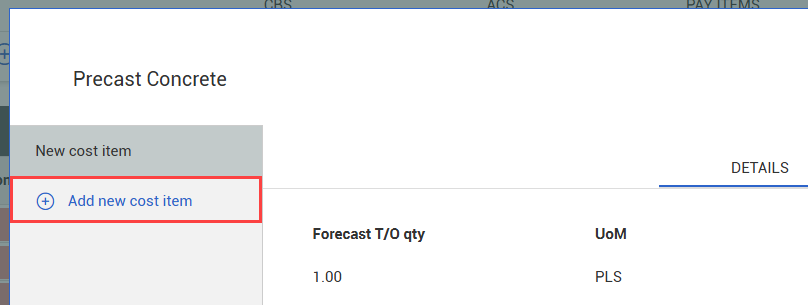
When you need to create multiple cost items, you can save time by including additional cost items in the New cost item window. From the left panel, click Add new cost item to add another cost item record.
To copy the details of a new cost item record, click the Copy cost item icon.
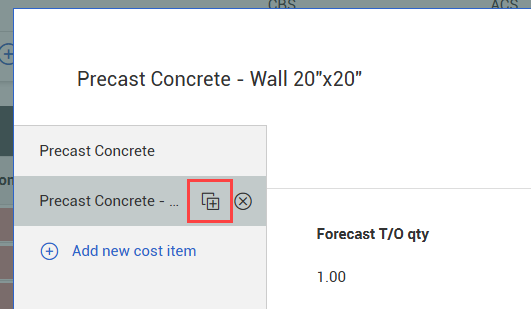
When you’re finished, click Save. The new cost items will appear in sequence in the CBS.

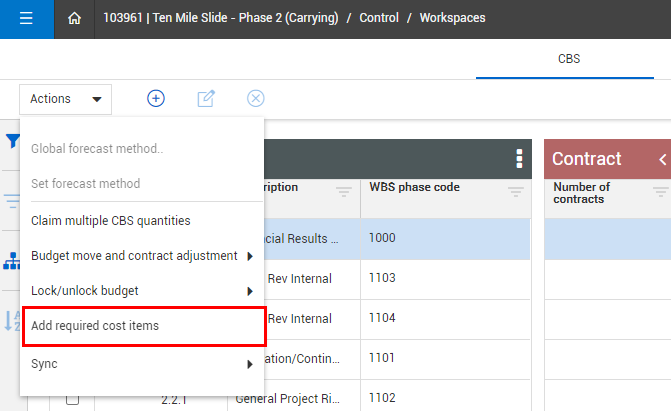
The Required cost items feature lets you create standardized or commonly used cost items at the organization level, and then add them at the project CBS level. Changing any of the required cost items at the organization level, such as the account code or UOM, also updates the cost items at the project level.
When required cost items are added in Settings > Control > Others > Required cost items, the feature provides standardization across all projects for those cost items that are commonly used.
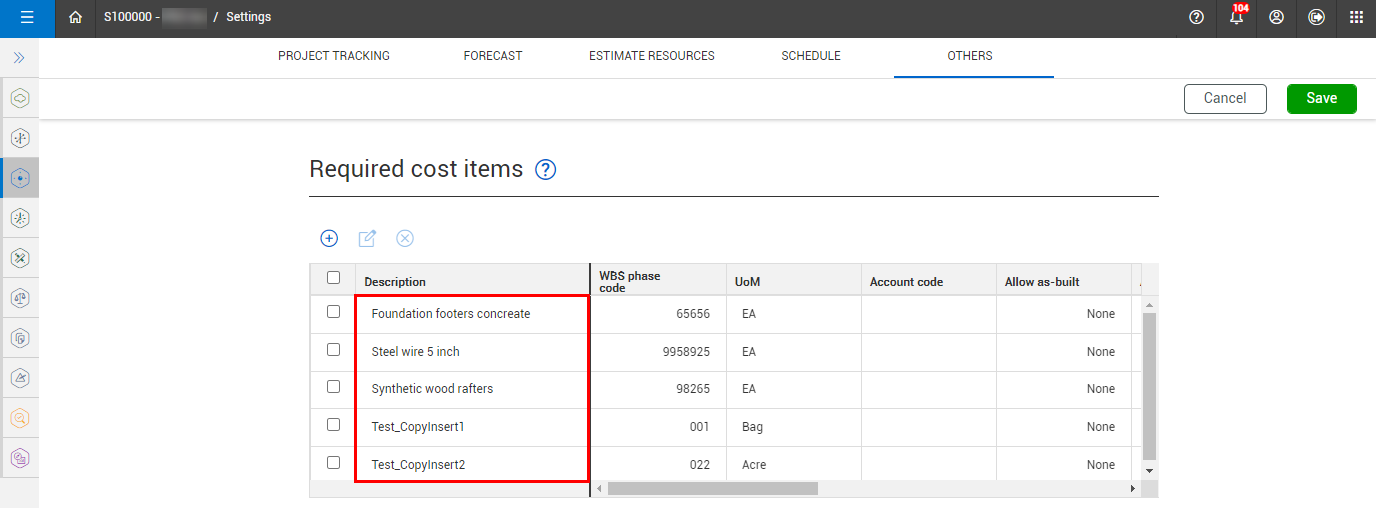
This feature can be a substitute for copying and pasting cost items from one project into another and ensures the same WBS phase code is being used regardless of the project a team member is working on.
As the project progresses, you may need to rearrange cost items in the CBS to accommodate project changes.
Select the cost item(s) that you want to move.
Right-click the cost item(s) to open the cost item menu, and then select Adjust CBS position.
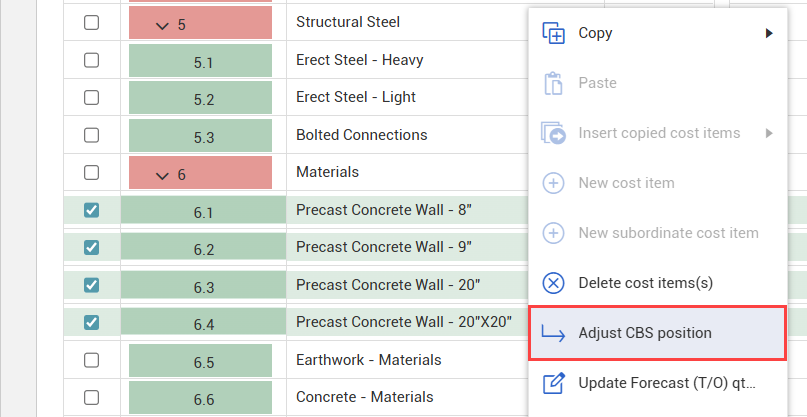
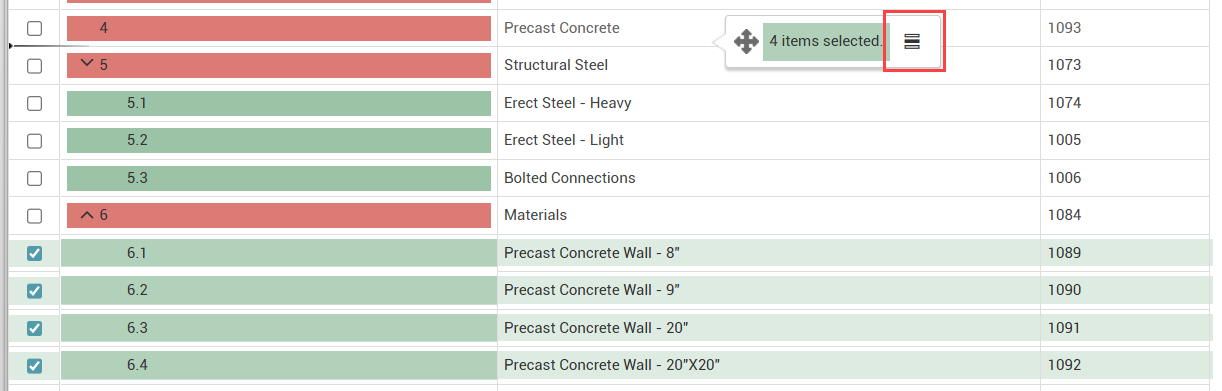
In the Adjust CBS Position window, drag and drop the selected cost item(s) into a new position in the CBS.
This icon indicates that the cost item is moved into a subordinate position.
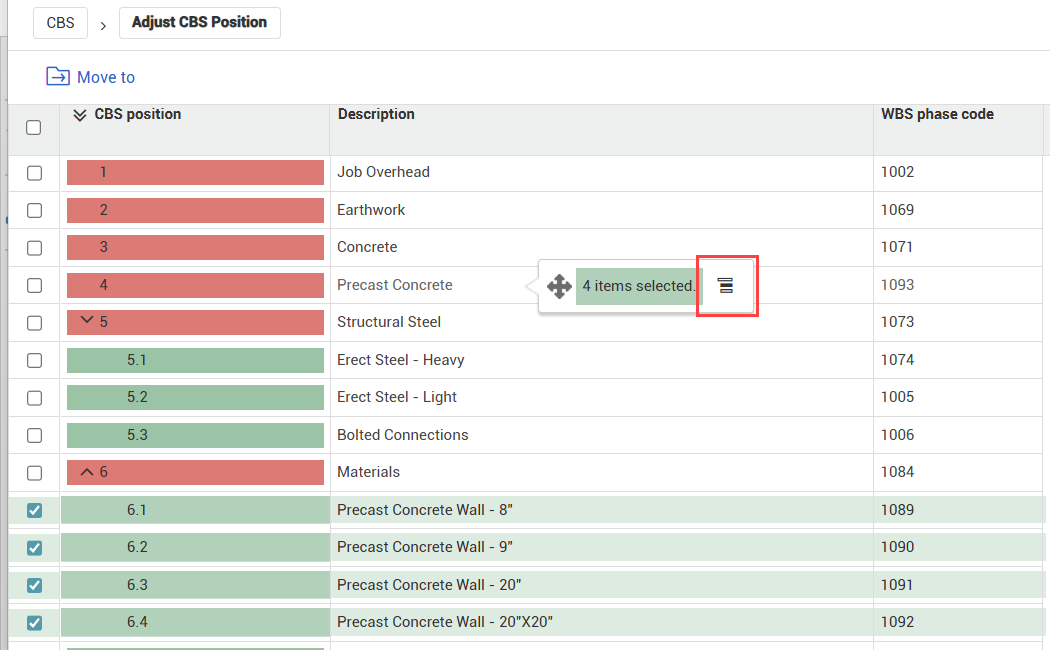
This icon indicates that the cost item is moved into an equal position.
If you prefer not to use drag and drop, click the Move to icon. Input the applicable CBS position, and then click Move to again. Select Child to move the cost item(s) into a subordinate position, or Sibling to move the cost item(s) to an equal position.

Confirm the new position in the Adjust CBS Position window. When finished with the changes, click Save.
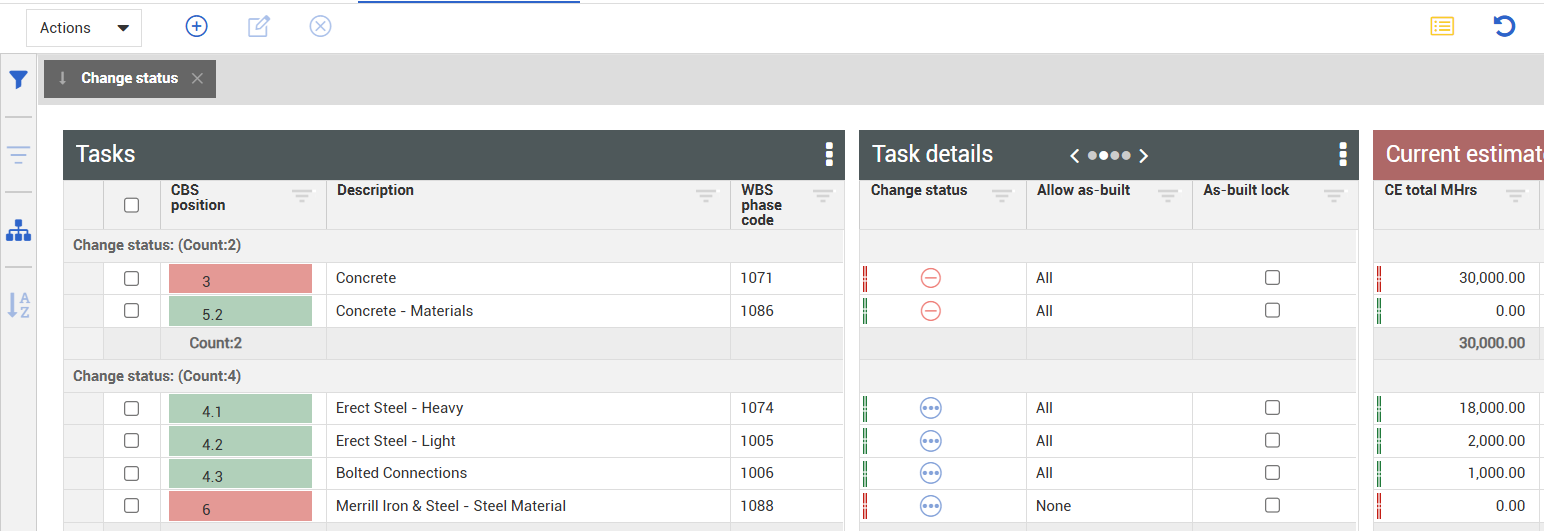
Navigating the CBS can be challenging when searching for specific information, as data is often distributed across multiple levels. Projects may contain large volumes of diverse data, making it difficult to locate and view relevant details- especially in a flat list format. The CBS Group By feature helps simplify this by allowing users to organize the CBS into logical groupings based on shared attributes. You can drag and drop column headers to group cost items by the criteria most relevant to your workflow.
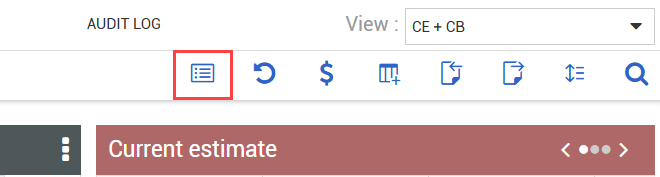
On the CBS register tab, select the Group Columns icon on the right toolbar.
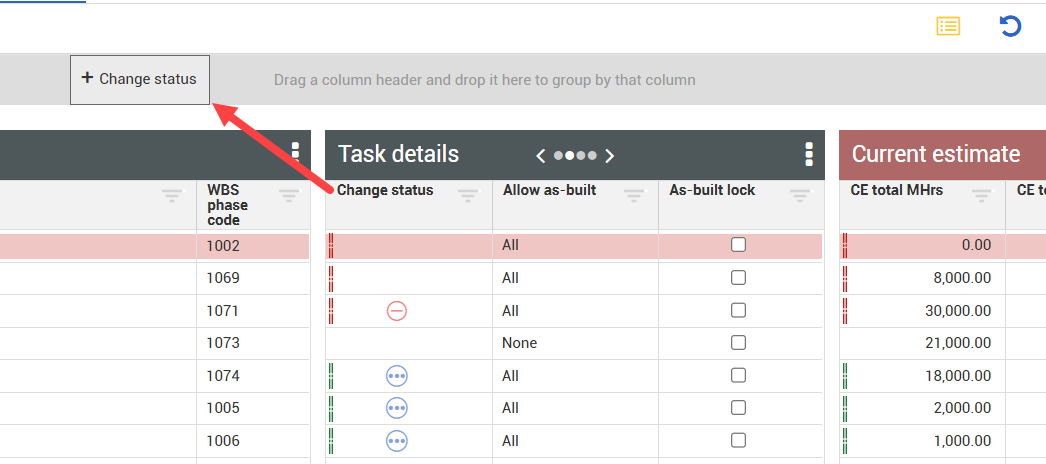
Drag the column header of a column and drop it into the grey grouping area.
Note that this feature can only be used with columns with a predefined set of discrete values, such as UoM or Allow as-built.
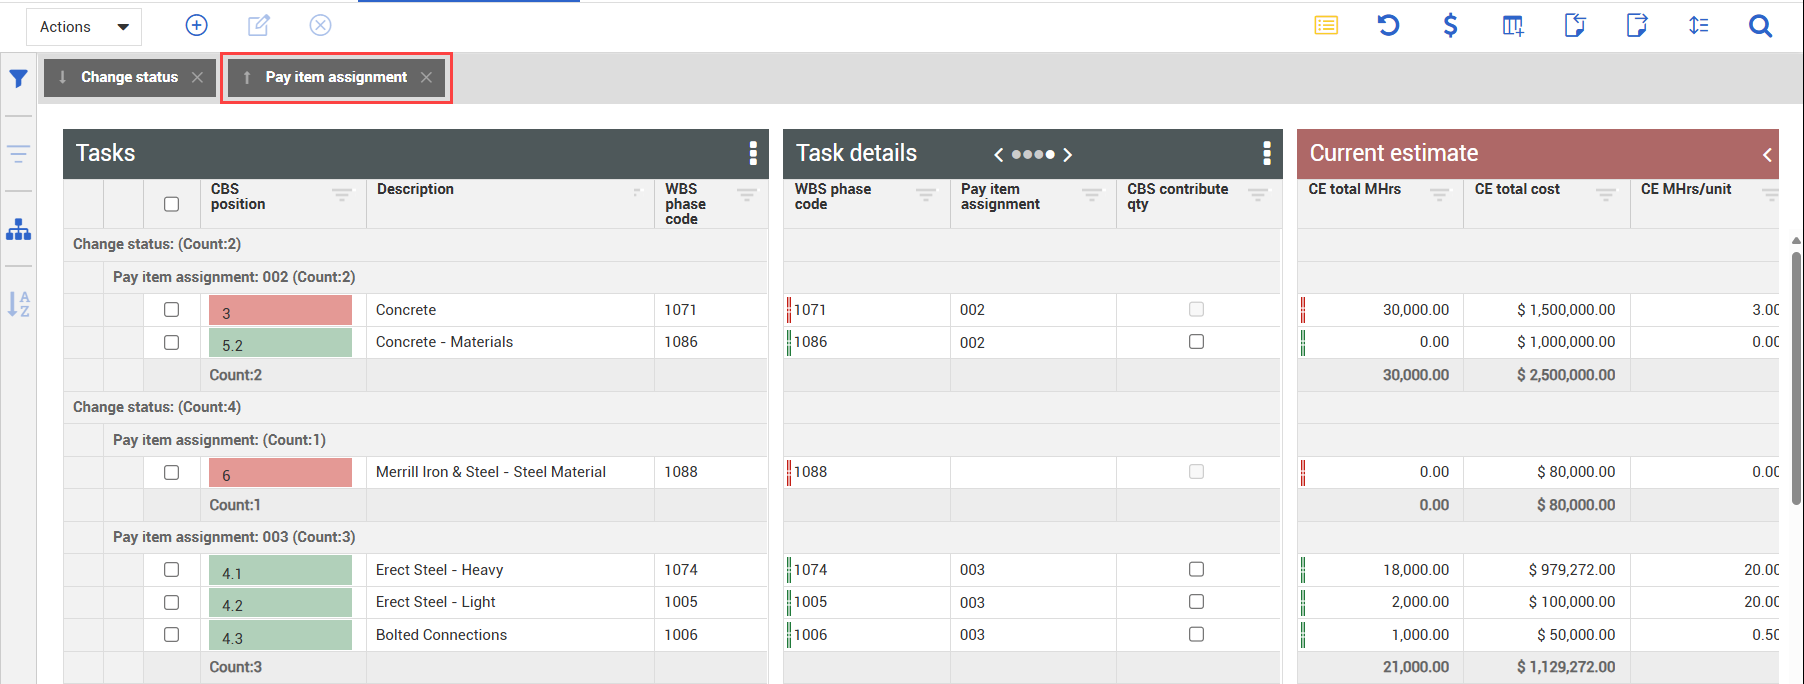
To add subgroupings, drag and drop additional column headers into the grouping area. You can rearrange these headers in the grouping area to modify the subgroups.
To return to the standard CBS, click the Group columns icon again.
You can delete one cost item or multiple cost items by selecting the cost items, right clicking, and then selecting Delete Cost Item.
When deleting cost items from the CBS, deleting the forecast, clearing out the account code, or changing attributes to delete a cost item is not necessary.

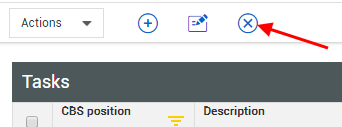
You can also select a cost item and click the Delete icon on the left toolbar.
A cost item must meet the following conditions to be deleted:
Total Cost (To Date) = 0, MH (To Date) = 0, Eqp Hours (To Date) = 0, Qty Complete (To Date)=0
C B-Total Cost = 0, C B-Total MH = 0, CB-Total Quantity = 0, C B-Qty Remaining = 0
If the cost item is a parent item, all the subordinate cost items will also need to be checked to see if they can be deleted
If you are deleting multiple cost items and do not meet the following conditions for deletion, a downloadable file appears that lists all of the validations and why they failed.
You can copy and paste entire cost items with resources from the CBS tab to any cost item you select.
When you copy a cost item, you cannot copy the current budget because the current budget must be approved in a contract adjustment or budget move.
Follow the step by step to copy a cost item.
From the CBS tab, select one or more cost items that you want to copy that contain a resource.
This can be checked in the Resources column. If the cost item has a 1 or higher, then a resource is attached to that cost item.
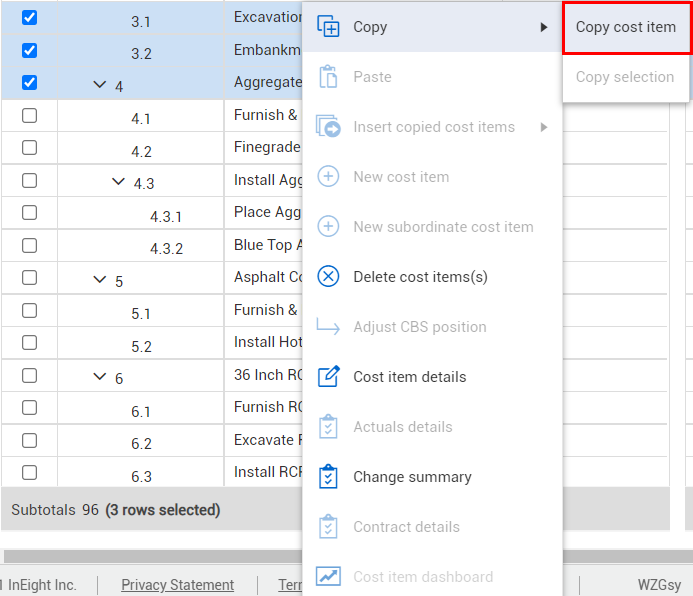
Right-click your selected cost items.
Hover over the Copy selection and select Copy cost item.
Right-click on another cost item in the CBS tab.
Hover over the option Insert copied cost items. You have three options as to where to place the copied cost items:

You can also view the pasted cost items in the Resources tab of the Cost item details slide-out panel.
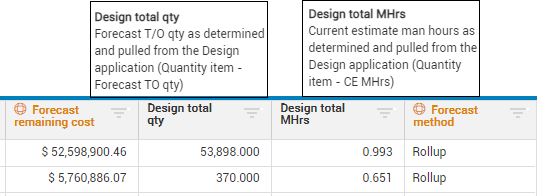
Control displays the sum of the Forecast T/O quantity from the associated InEight Design items against the attributed cost items. You can compare the Design total quantity and Design total man-hours to the Forecast (T/O) quantity and Forecast hours columns, to make sure the values match up with what is in Design.
You can also create cost items with resources in Change, and then have them created in Control upon the approval of a contract adjustment. This reduces the amount of extra steps needed for creating cost items in multiple areas.
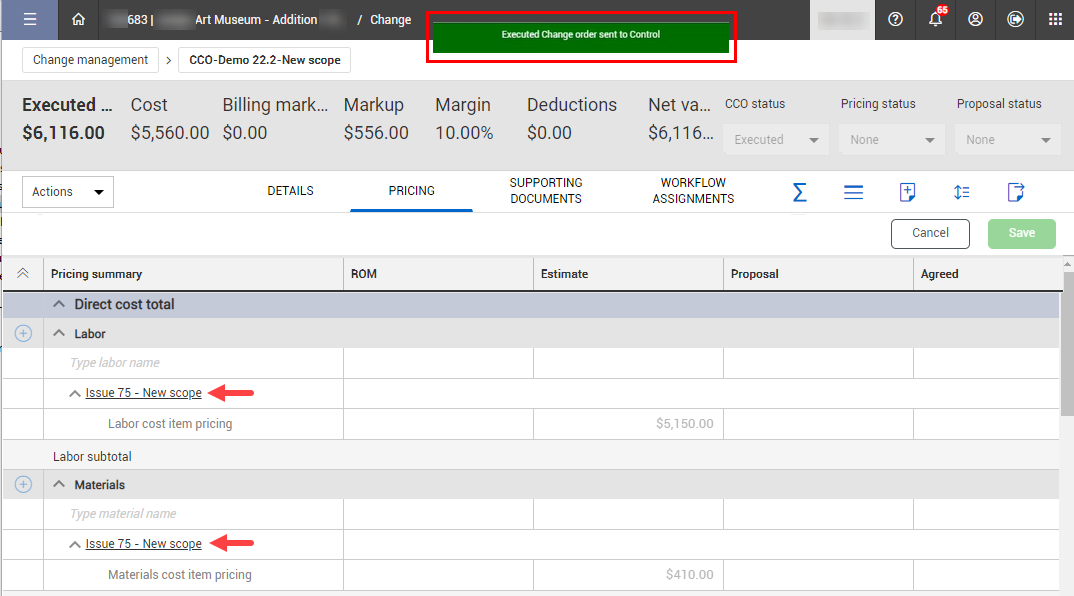
Creating cost items in Change is performed by first creating an issue with your newly created cost items, then executing your change order.
 pu
pu
In Control, go into the Change Register and click on the change order to review the new cost items that originated from Change.
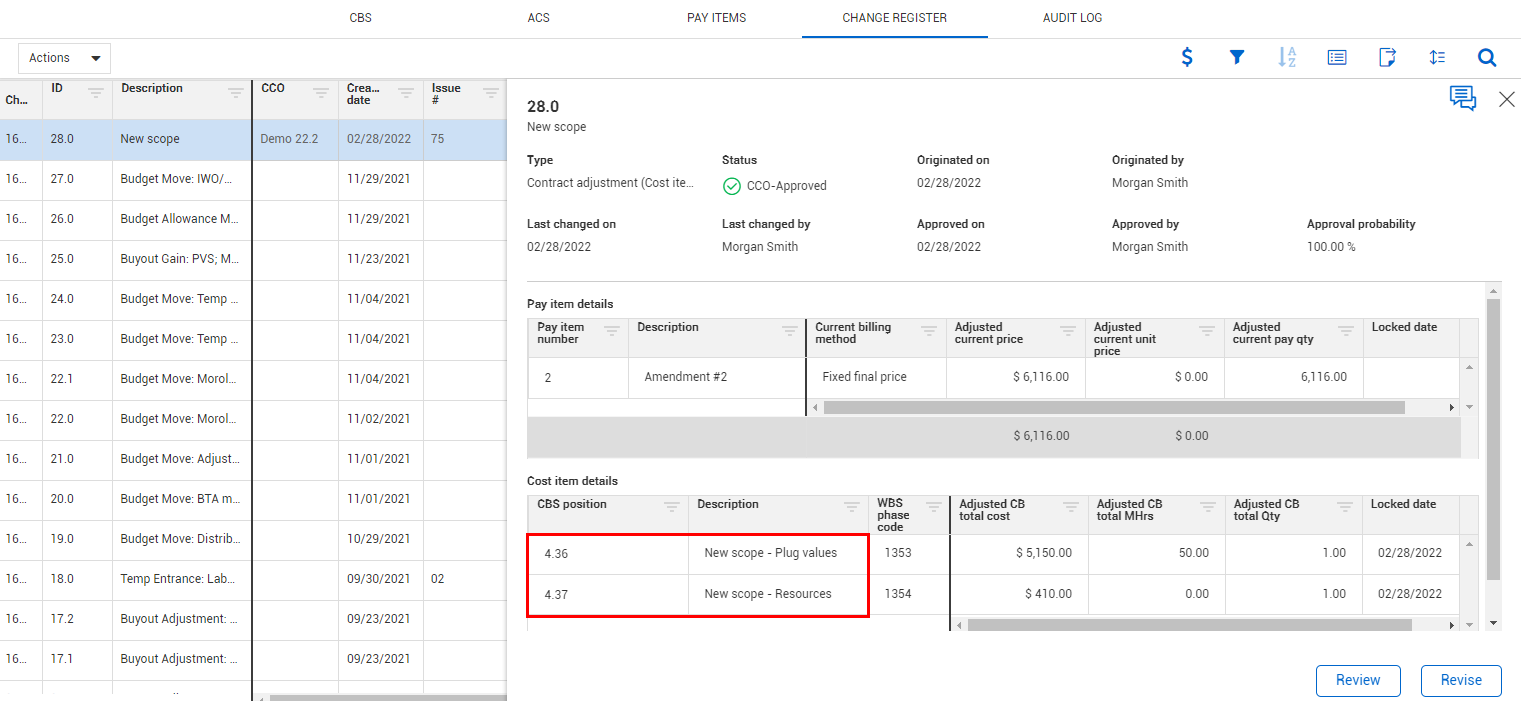
Revise the change order to make any further adjustments, such as associating pay items to your cost items. Notice how the cost category assignments have all come over to Control that originated from the change document.

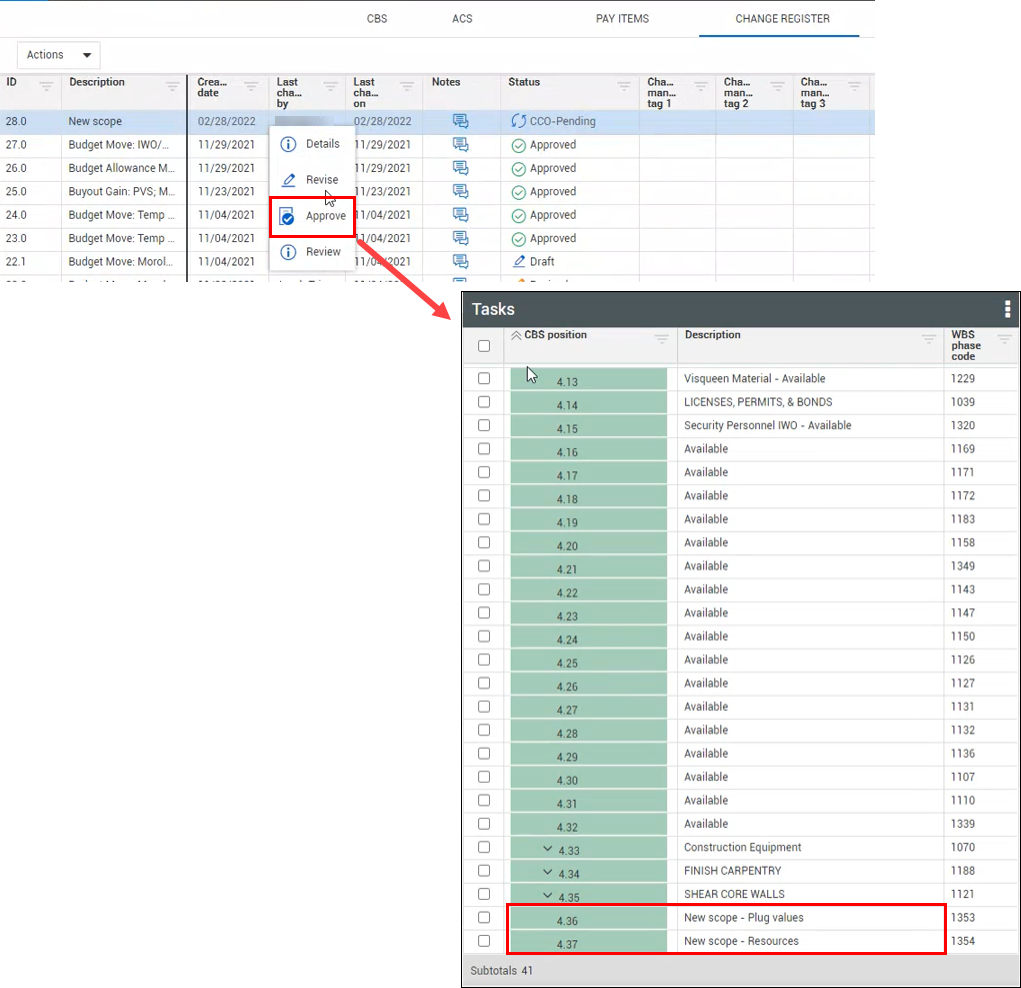
Approving the change order creates the new cost items with the resources specified in Change, and places them within the hierarchy specified in the contract adjustment, and if none is specified, then they are placed at the bottom of the CBS.
Additional Information
9977 N 90th Street, Suite 250 Scottsdale, AZ 85258 | 1-800-637-7496
© 2024 InEight, Inc. All Rights Reserved | Privacy Statement | Terms of Service | Cookie Policy | Do not sell/share my information